How to Customize Your Tracking Page
This guide outlines the technical steps to create and activate a customized tracking page for your customers.
Unlike emails, the tracking page is one per language, not per shipment status.
1. Upload your Brand Logo
- The simplest way is to upload it to Settings > Channel. It will be automatically resized and placed in the template.
- Alternatively, insert it via the Drag & Drop editor using the Image element for more control over size and link.
2. Create & Manage the Template with Q’editor
Choose a Starting Template
- Go to Marketing > Tracking Page and click “Create New”.
- Choose either a Blank Template or one of the 50 predefined templates.
![]()
Set Page Properties
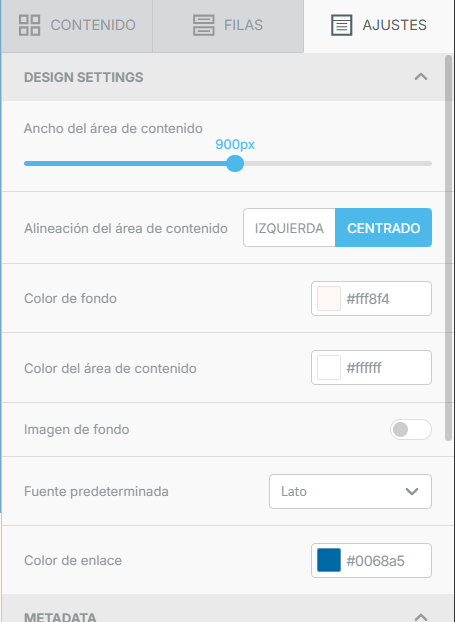
3. Customize the Content
Use the “Content” tab to add and configure page elements.
- Essential Tracking Elements
- Progress Bar: Drag the “Shipment Progress Bar” element. Choose among 3 layouts—Base, Elegant, and Classic—each with customization options (colors, icons, borders).
- Shipment History: Add the “Shipment History” element to show the detailed list of all shipment statuses reported by the carrier.
- Marketing & Support Content
- Text & Metavariables: Insert custom text using metavariables.
See the guide: Qapla’ Metavariables. - Images, Video & CTAs: Works the same as in the email editor.
Add promo banners, videos, and buttons with links that include UTM parameters to track performance. - Product List: Use the “Product List” widget to show a summary of the items included in the order.
- Ticket System
- To activate it, go to Marketing > Ticket and set the email address to receive requests.
- Then drag the “Tickets” button into the tracking page template.
Customers can open it to write messages and upload images.
Your team can reply directly from Qapla’s “Tracking” area.
- Text & Metavariables: Insert custom text using metavariables.
- External Integrations
- Custom HTML: Use the HTML widget to paste third-party scripts.
- Ready-Made Widgets: Drag widgets from services like Transactionale, Clerk.io, or Bantoa to add cross-selling and product recommendations.
To enable them, first connect the services from the App Store available in Settings > Channels.
4. Customize URL, Title & Favicon (Optional Feature)
If you purchased the feature, you can personalize the tracking page URL.
Instead of https://tracking.qapla.it/
it becomes https://tracking.iltuosito.it/
- Contact Qapla’s Success team at success@qapla.it for DNS and SSL certificate setup.
- In the same section (Marketing > Tracking Page), you can set the browser tab title and upload your favicon.
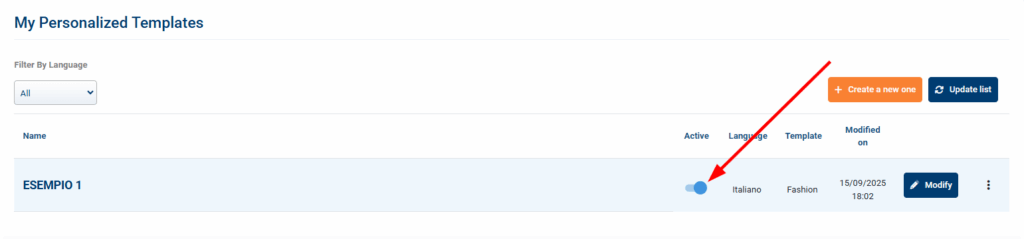
5. Activation (Go Live)
- After saving the templates for the languages you want, return to Tracking Page Management.
- Enable the templates you want to make live. Remember: only one template per language can be active.
Need help?If you need assistance, contact Qapla’s Customer Care at support@qapla.it